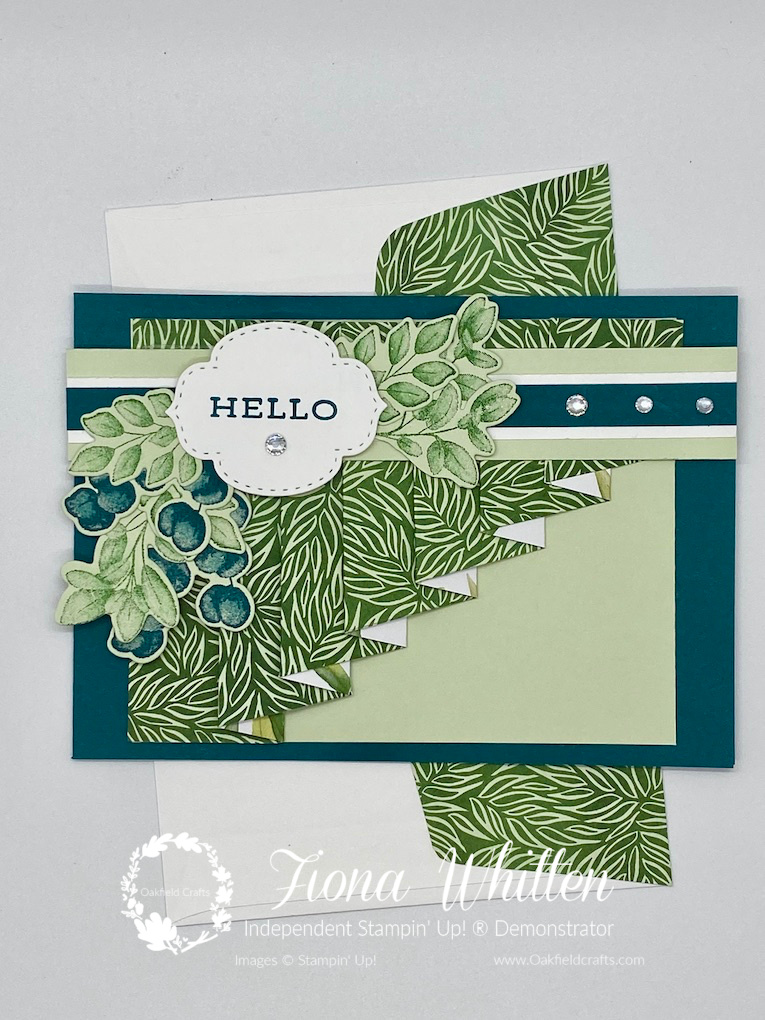
Let me show you how to make this Drapery Fold Card. I shared it as part of my series of Facebook Lives that I call Stamping and Card Making Techniques.
I try to go live every Wednesday morning at 10:00 am. The 1st and 3rd Wednesdays of each month are for my Virtual Card & A Cuppa. And, the remaining Wednesdays are for Stamping and Card Making Techniques.
On this week’s video I promised to share written instructions for the cutting, scoring and folding to create the drapery fold. Details are as follows –
Cutting Instructions
- 12″ x 12″ sheet of double-sided paper cut to 9.5 x 30.5 cm. Take care to ensure that any directional images or sentiments stay the right way up. I used the retiring Forever Greenery paper from the 2020 Catalogue.
- A4 card stock cut to
- 10.5 x 29.7 cm and then scored and folded in half at 14.9 cm to create the base card.
- 1.0 x 14.9 cm (strip across the top).
- A4 card stock in different colour to 2 (or white/vanilla) depending on the background colour of the double-sided paper. Cut this to
- 9.5 x 12.4 cm (the scored and folded piece of double-sided paper is glued to this) and
- 2.5 x 14.9 cm (strip across the top).
- A4 White or Vanilla card stock depending on background colour of double-sided paper. Cut this to
- 10.0 x 14.4 cm (for inside the card) and
- 1.5 x 14.9 cm (strip across the top).
Cutting and Scoring the double-sided paper
- Have the double-sided paper placed in landscape format – the design you want to see the most of facing you.
- Use a pencil and ruler to mark a point 3.5 cm in from the bottom left-hand corner. The mark will be on the bottom edge.
- Repeat 1. but this time drawing a mark 3.0 cm down from the top right-hand corner.
- Draw a pencil line between the two marks and then using scissors cut along the line.
- Use the top portion of the divided piece of double-sided paper to create the drapery fold.
- With the long straight edge at the top on your trimmer (with scoring blade) or scoring board and working from the left-hand side score as follows 3.5 cm, 5.0 cm, 8.0 cm, 9.5 cm, 12.5 cm, 14.0 cm, 17.0 cm, 18.5 cm, 21.5 cm, 23.0 cm, 26.0 cm, 27.5 cm. There should be 12 scored lines.
Folding the double-sided paper
- Have the side you want to see the most of facing you. To fold, start at the widest end and the score line at the 3.5 cm point. First fold is a valley fold (∨) and next a mountain fold (∧), repeat the two folds to the end. Burnish the folds on both sides of the paper. I like to burnish just the top edge but you can burnish the whole length.
- On the reverse side of the paper adhere the folds down. You may find that the paper curls slightly but it will lie flat once adhered to the card stock.
- Double check the measurements for the finished fold and trim the 9.5 x 12.4 cm piece of card stock if required.
- Adhere the folded paper to the rectangle of card stock. This is the finished fold and you can now adhere it to the card front and decorate as you like.
If you haven’t already seen the video of me making the drapery fold card you will find it here. Simply click on the YouTube link below. Don’t forget to subscribe to my channel so that you can see future videos when they are posted.
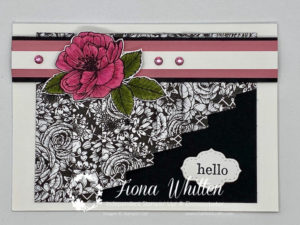
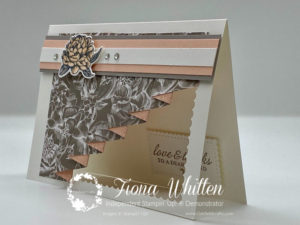
Other cards shared – the inspiration for these cards comes from Elodie Bertrand
These are the other cards that I shared on the video.

Supply List
I hope you have enjoyed seeing my drapery fold cards. If you would like to purchase any of the supplies I’ve used, you can do so by clicking on the appropriate picture below.
Please note that the Peony Garden Designer Series Paper, Pretty Peacock card stock and ink are all on the retirement list. The Forever Fern Bundle (save 10% on the individual prices) is also on the retirement list but individual items will be in the 2021 Annual Catalogue.
If your order is less that £150, don’t forget to use this month’s host code – GRDN2GPG and receive a special thank you from me.
Spending more than £150? Don’t use the code because you will have your own rewards to spend. This means you can order extra products for free from the current catalogues or clearance rack.
Alternatively, if spending more than £99 why not join the Crafting Acorns and receive a discount on your future orders. Joining during April means that you can add select items from the upcoming 2021 Annual Catalogue. A great way to get new products early. Contact me by emailing to fiona@oakfieldcrafts.com for more information.
Happy stamping
Fiona xx
Other ways to shop and save this month
Bundles – Bundled items save you 10% and that means you get to save on the new Butterfly Brilliance bundle and losts of others.
2020 Catalogue Retirement List – Some items have been discounted so don’t forget to check it out.