Hello and welcome to the Global Stampers January 2018 Blog Hop.

This month we are featuring projects made using some of the amazing new products in the 2018 Spring/Summer or Sale-A-Bration catalogues or favorites that have carried over from the Autumn/Winter Catalogue.
We had free reign to do what we liked, and after lots of deliberation I’ve opted to go with the Flying Home stamp set.
I love watching the birds in our garden. This past year we had a very large family of Blue Tits in the birdbox on the side of the house. The box is not as cute at the ones in the stamp set but there is a camera in it so we got to see the baby birds hatch, grow and then fledge the nest. It was all really exciting.

This is a great stamp set for those of you who love to colour and you can find it on page 41 of the Spring/Summer Catalogue.
This first card I kept simple with some stamping, colouring and a little fussy cutting too. I went for more vibrant colours for the card base and the main colour on a couple of the houses.
I stamped the image onto a rectangle of Thick Whisper White and then coloured in the two bird houses either end. In fact, if you look closely you can see that I started to colour the house in the middle and then had a change of heart. Instead, I restamped the image onto a scrap piece of Thick Whisper White and simply cut around the middle house. I then coloured the house and popped it onto the original image using Stampin’ Dimensionals.
The stamp set has some really cute butterflies and birds. So, as an added element I stamped and coloured a butterfly and then fussy cut it out too. I flexed the wings a little, and glued just the body onto the corner of the Whisper White panel.
Of course there had to be a little something on the inside too, so I simply stamped and coloured the inside piece of Whisper White before it was glued in.

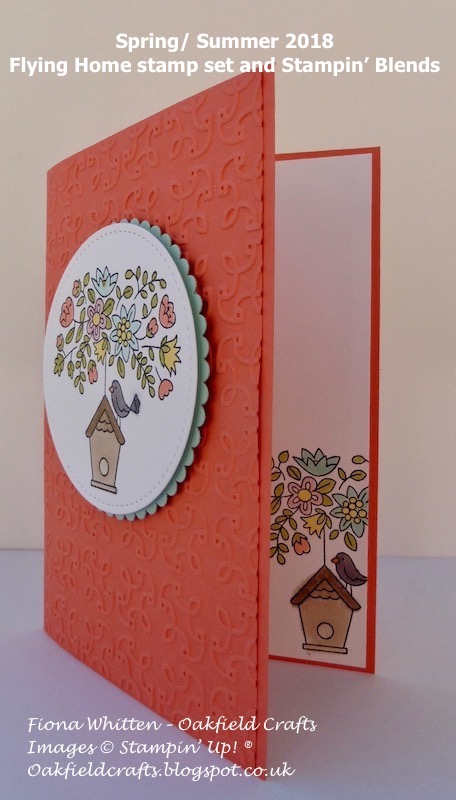
For my second card I decided to go a little more complicated. Actually it’s not really complicated, it’s a bit of die cutting, embossing and a few layers to add dimension.
The birdhouse image was stamped and coloured before I cut it out using a circle from the Stitched Shape Framelits.
I then cut out a slightly larger scallop circle from a piece of Soft Sky cardstock using the Layering Circle Dies. The two circles were fixed together using Stampin’ Dimensionals.
The panel of Calypso Coral was embossed using the Garden Trellis embossing folder before being glued directly onto the Calypso Coral base card.
I stamped a partial image for the inside of the card and coloured it using the exact same Stampin’ Blends as the front the card.
For my last card I decided to use a piece of the new Petal Passion Designer Series Paper (page 23 of the Spring/Summer catalogue) as one of my layers.
I went for this particular design because it made me think of leaves and berries on a tree. The paper is paired with an Old Olive card base and a layer of Basic Black.
The whole thing is tied together by using an Old Olive scallop oval from the Layering Ovals Framelits. This oval sits beneath the stamped image which had been cut out using an oval from the Stitched Shapes Framelits.
I added a strip of Basic Black before I added the Old Olive scallop oval and finished the whole thing off with a bow made using the new Organza Ribbon.

If you have never used Stampin’ Blends before here are some tips:
1. Use Thick Whisper White cardstock to stamp your image on.
2. Stamp the image in Tuxedo Black Memento Ink. The Stampin’ Blends are alcohol markers so you do not want to use an alcohol based ink pad.
3. It’s up to you on whether you use the small or brush nibs to colour with.
4. Colour small areas at a time and remember to put the lids back on if not being used for a little while.
5. Use a Color Lifter pen to remove colour if you have gone over the lines. If it does not remove it first time, leave to dry and then go back with the Color Lifter.
6. Store your Stampin’ Blends horizontally, don’t stand them up on their ends for storage. That way the colour will stay at both ends.
I’ve put together two lists of items (both using Clear Mount stamp sets) that I’ve used which comes to £45 or £90. Either of these would get you Free item(s) from the Sale-A-Bration catalogue. Details of these can be found at the bottom of this post.
In the meantime, I hope you have enjoyed my projects.
If you want to continue and hop forward to visit Robbie or hop back to see what Ann has been up to you can do so by clicking on the links below.


Option 2 (you can change out the Stampin’ Blend colours if you prefer others) – Choose one Level 2 item OR two Level One items from the Sale-A-Bration catalogue for FREE
Please note that the Flying Home stamp set is also available in Wood Mount if you prefer (item no. 145926 £23.00)
Very cute cards Fiona!
Thanks for stopping by Robbie. I had such fun making these cards. x
The bird houses are just too cute & I love your colouring 🙂
Thanks for stopping by Alicia. The Stampin' Blends make it so easy to colour the cute images but they would look just as good using ink and blender pen or ink and an aquapainter.
I love your card, this stamp set is so fine
Thank you for stopping by Valerie. This is my favourite stamp set so far but I'm sure I'll change my mind once I play with other things.