As I mentioned on Friday, my plan this week is to make a few projects using the Watercolor Wings stamp set.
There are lots of lovely ideas and colour schemes on Pinterest and other places. I love that the stamp set can be used with so many different coloured inks and as a result there is no end to the different coloured looks you can get. However, today, I have decided to buck the trend a little and use just one colour to make my butterflies (well two if you include black). I opted to use Wisteria Wonder to stamp the butterflies for today’s project.
I’ve been playing around with the best way to get results when using just the one colour as it involves lots of stamping off before putting the stamp to the piece of paper that you want the final butterfly to be on.
This is what I’ve learnt.
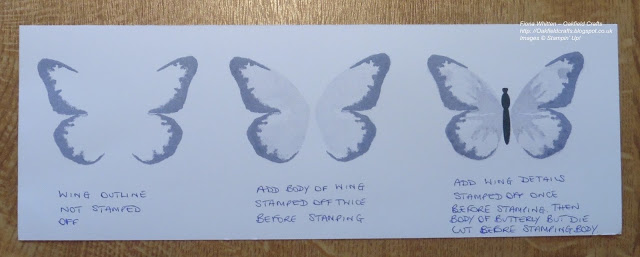
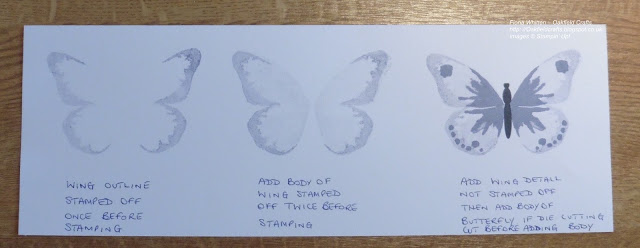
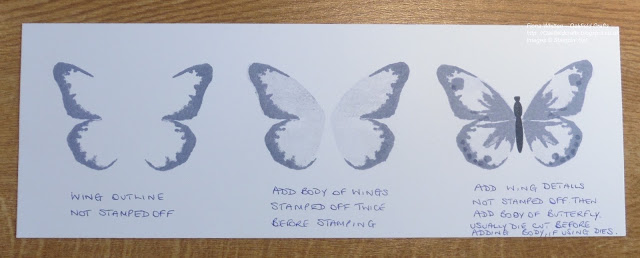
1. Stamp off twice before stamping the body.
2. Stamp off once before stamping the next layer of stamp and
3. Don’t stamp off for the layer you want in full colour.
The reason that I’ve not said which stamp to use in 2 and 3 is simply because you can change the look of your butterfly depending on which stamp you use.
Another lesson that I learnt when using just the one ink pad, is that if you stamp the body first it is so faint that you may have difficulty lining up the other stamps (it could be because I have poor lighting or eyesight at the moment). The way around it, is to stamp the outline of the wings first which may or may not be the layer you stamp off once or don’t stamp off at all.
You can see below how using the different stamps with the various stages of stamping off can vary the look.
Hopefully you can read the notes that I added to each stage of the stamping.
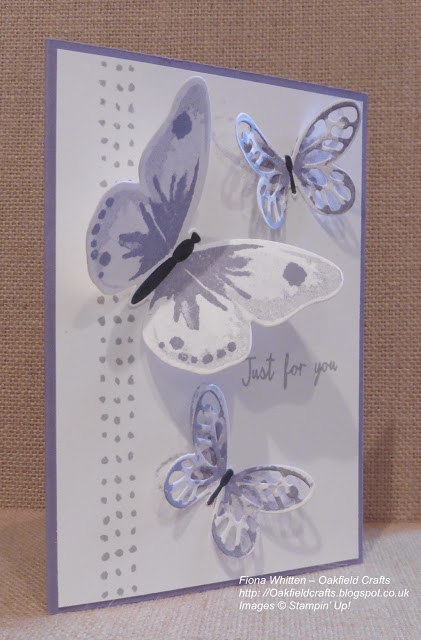
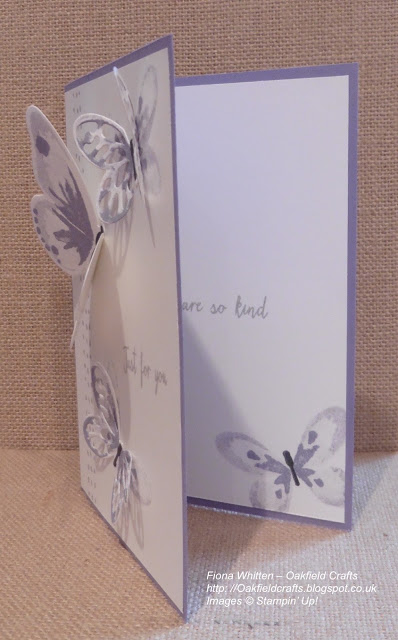
This is the finished project that I made.
The large butterfly was made using the second method above (wing outline stamped off once) and the small butterfly inside was stamped using the second method too. I also stamped the card front with this method before adding the die cut butterflies. You can just make this out in the photo below.
I used the third method for the smaller butterflies on the front of the card because I had planned to die cut them. I wanted the edges of the wings and the wing details to stand out more and stamped details are sometimes lost when you are using some of the more intricate dies.
Have fun trying the different combinations with different single colours, I certainly plan to try out other colours when I get a moment.
Full details of the Stampin’ Up! products are below. Please note that I have shown both the bundle option (save 15% on individual prices) and the stamp set and dies separately.
I have a few more Watercolor Wings projects planned for this week but in the meantime, if you don’t have the set but would like it, click on the picture in the carousel above and you will be taken to my On-Line store.
