Everyone attending this months classes will be receiving a whole pack of the All Abloom Designer Series Paper. I have a number of projects lined up for everyone to do plus instructions and other ideas for what they can do at home. I’ve made up all of my samples and of course I have lots of DSP left. In fact, I seem to have lots of bits left from various packs of DSP, including some from the All Day Event in held in mid February.
At February’s event we used the Something Borrowed Designer Series Paper and I’ve now used my scraps to make a few extra cards. The Whisper White Note Cards are great for this as they are pre-cut and scored and are a great size for this sort of project.
These are the cards that I made.
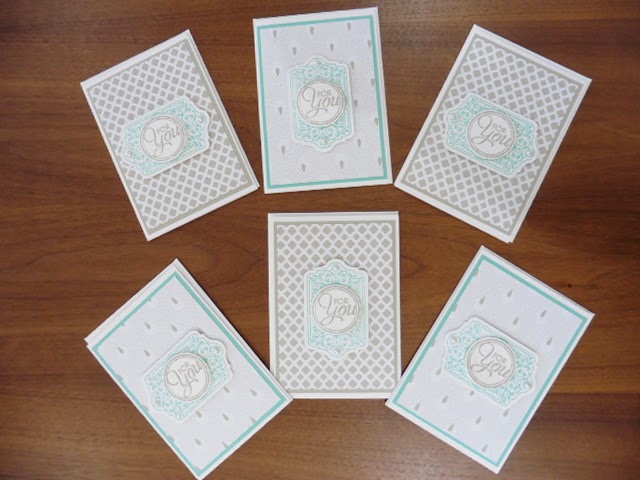
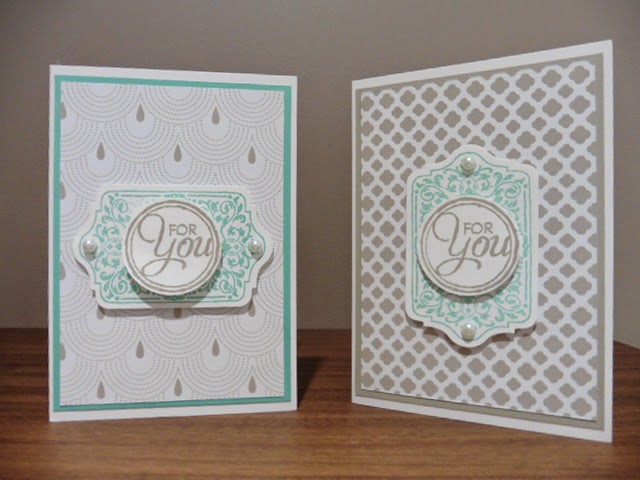
I made six of these cards and here’s a better photo of two of them. This is such an elegant set of papers that I decided to keep the cards simple and used just the Chalk Talk stamp set with the matching Framelits Dies to cut out the medallion (the stamps and framelits are available individually and as a bundle). A 1-3/8″ Circle punch was used to punch out the greeting.

1. Starting with a 12″ x 12″ piece of card stock or Designer Series Paper, cut it to 8-5/8″ x 8-5/8″
2. Using the Envelope Punch Board, punch and score at 3″ and 4-5/8″ along the first side.
3. Turn the Card Stock/Designer Series Paper and line up the scores with the Score Guide and punch and score along.
4. Repeat Step 3. until all 4 sides have been punched and scored.
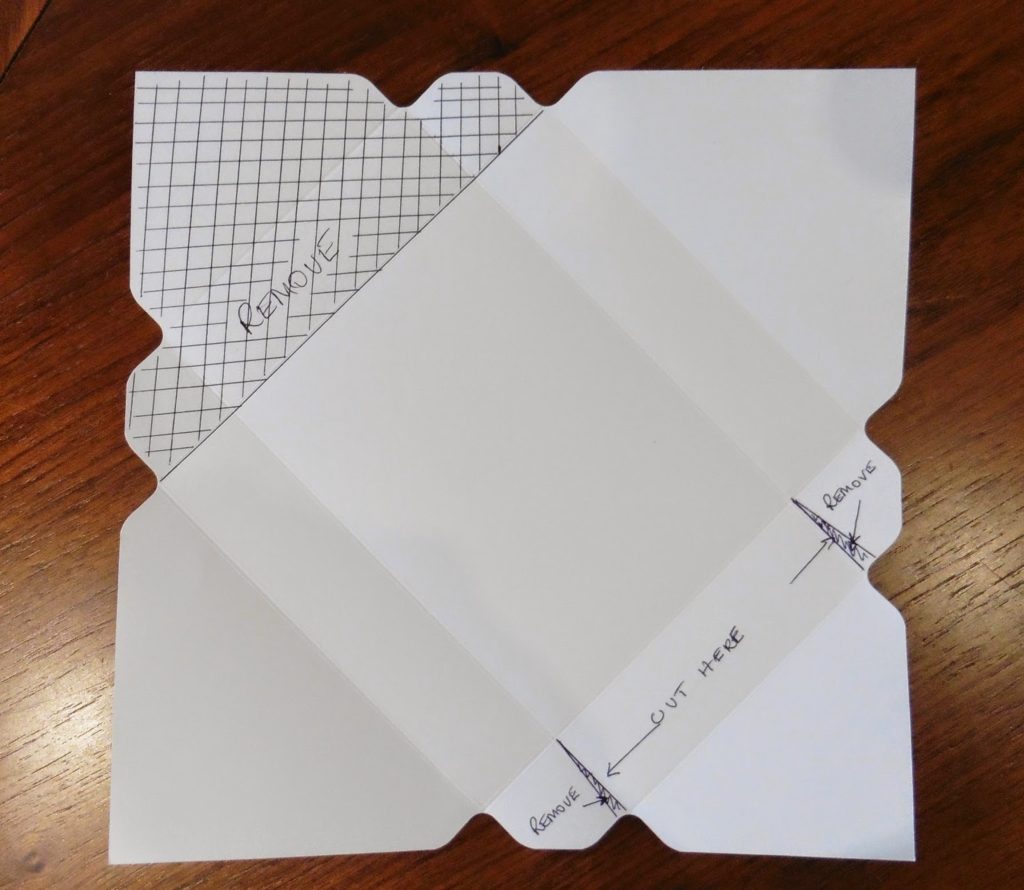
5. Using the photo above as a guide cut off one of the smaller pointed corners.
6. Cut tabs on the opposite side as per the photo.
7. Fold all the score lines and use a Bone Folder to give a good firm fold.
Please note that I have cut off the corner as I don’t want to make a box that is fully enclosed. You do not have to cut off the point and can make a full box by simply making the notches.
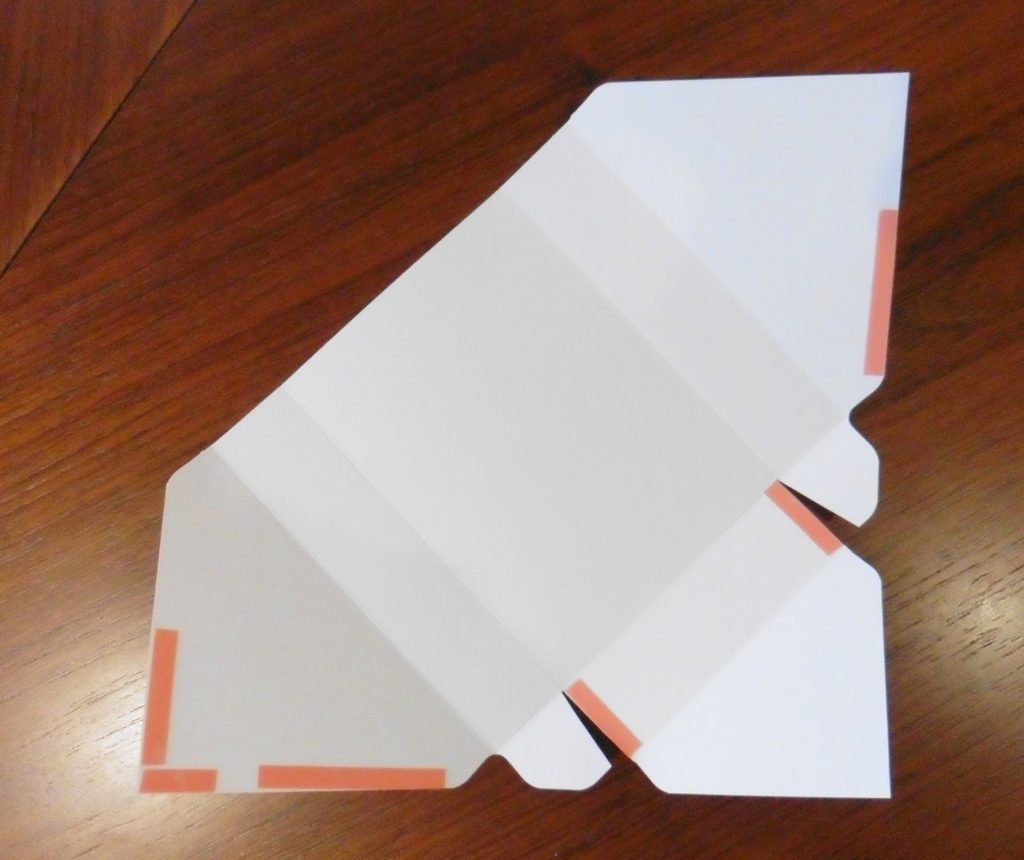
8. Add Red Sticky Strip as per the above photo. Don’t go too mad with the stuff. You only need enough to hold the box together and don’t want to end up with it sticking to the contents of your box.

9. Carefully fold and stick the box as per the above photo.
10. Decorate the box as desired.
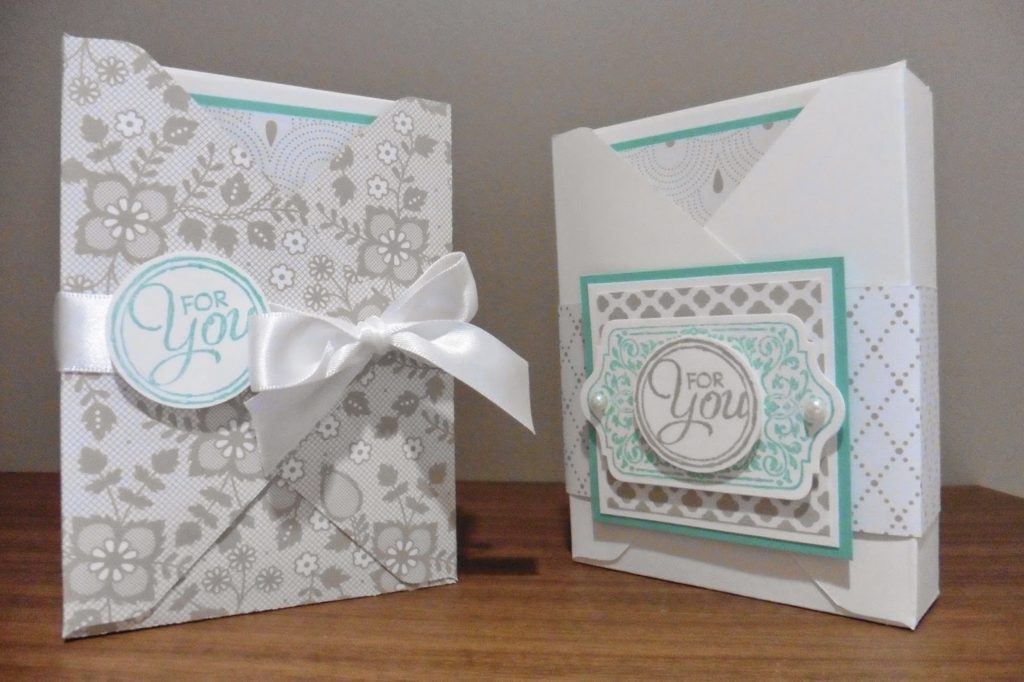
Here’s the two boxes that I have made – one from the Whisper White card stock and the other from some more Designer Series Paper. These DSP packs go a long way!
Have fun giving these a go and if you want to know what Stampin’ Up! products I used check out the following: