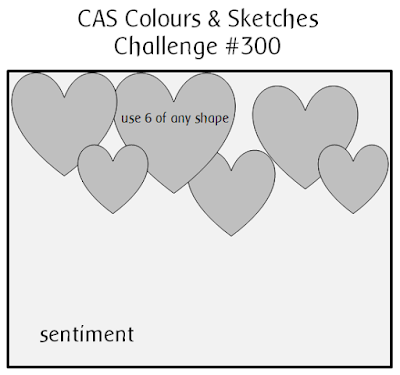
It’s the fourth Tuesday of the month and this week Patricia has a sketch challenge for us. This is also the 6th Birthday Challenge and we are celebrating with the 300th challenge.
For the challenge, you can use any shape that you like – you just need to use 6 of the same shape.
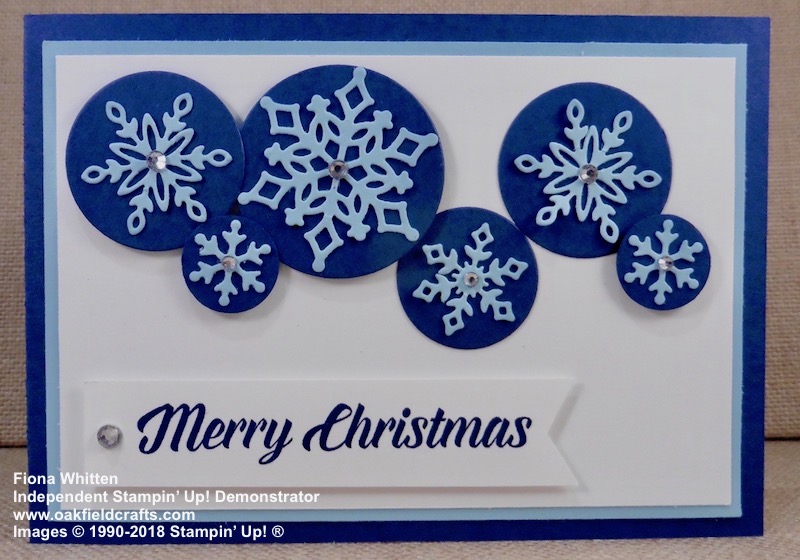
Seeing as there are only 4 weeks to go, I decided to keep with a Christmas theme for my card. I used the Snowfall Thinlits from the Snowflake Showcase and kept the colours to shades of blue.

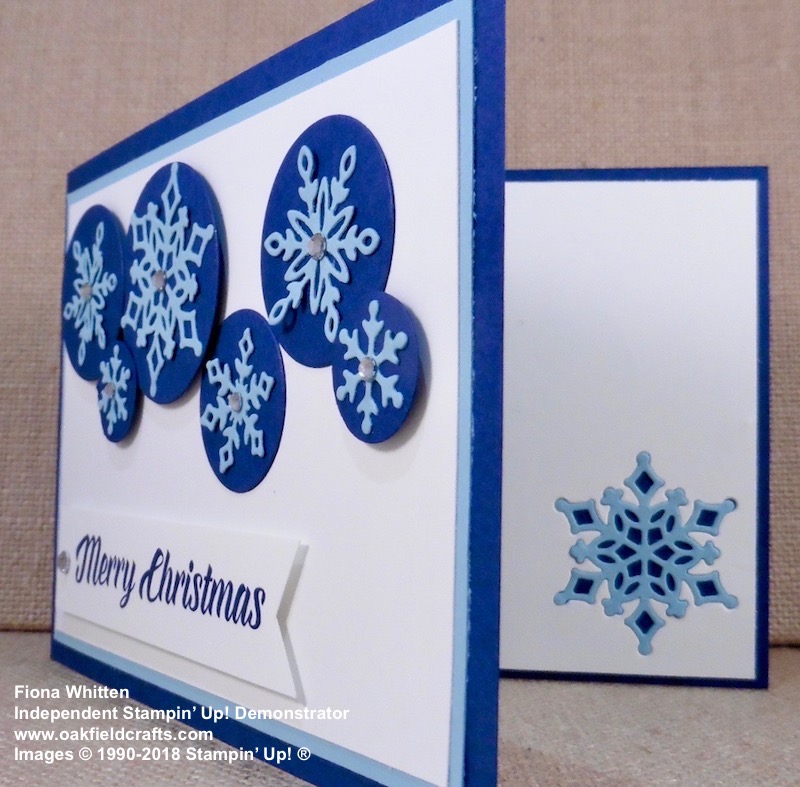
I used a snowflake to decorate the inside of the card.

Here are my instructions for the 6th Birthday Challenge card
Cutting instructions
- Night of Navy cardstock – 10.5 x 29.7 cm scored and folded in half at 14.9 cm to create the base card.
- Night of Navy cardstock – scraps for die cutting the 6 circles.
- Balmy Blue cardstock – 9.5 x 13.9 cm
- Balmy Blue cardstock – scraps for die cutting the 6 snowflakes
- Whisper White cardstock – 9.0 x 13.4 cm (card front), 10.0 x 14.4 cm (for the inside)
- Whisper White cardstock – 2.0 x 9.5 cm for sentiment.
Stamping and construction instructions
- Glue the 9.0 x 13.4 cm piece of Whisper White to the 9.5 x 13.9 cm piece of Balmy Blue.
- Stamp the sentiment in Night of Navy onto the 2.0 x 9.5 cm piece of Whisper White (close to the left-hand end) and then cut a V in the opposite end to create a banner.
- Using three different sized snowflake dies from the Snowfall Thinlits, die cut the six snowflakes for the front of the card and a seventh for the inside from some scrap Balmy Blue cardstock.
- Using the Layering Circle Framelit Dies, cut six circles from scrap Night of Navy cardstock. The circles should be slightly larger than the snowflake.
- Glue the snowflakes onto the appropriate circle and then fix the circle to the card front using a Stampin’ Dimensional.
- Adhere the banner sentiment to the card front using Stampin’ Dimensionals.
- Add rhinestones to the centre of each snowflake and also to the banner.
- Adhere the Whisper White/Balmy Blue piece to the Night of Navy card base using Stampin’ Dimensionals.
- Using the same snowflake die used to cut the seventh snowflake cut one into the bottom right corner of the 10.0 x 14.4 cm piece of Whisper White. Then glue the piece of Whisper White into the inside of the card and glue the seventh Balmy Blue snowflake into the hole.
I hope that my card has given you some ideas and inspired you to give the challenge a go. You will find the link to add your card along with pictures of all the other design team members cards over on the CC&S blog. Deadline for adding the link to your card is 11.00 pm (UK time) on Monday, 3 December.
Happy stamping.
Fiona xx
Ways to shop and save in November
Save 10% on Bundles from the catalogues. There is something for everyone simply because there are an amazing number to choose from.
Join my Team – Choose your own starter kit. You choose £130 worth of product for £99 (includes P&P) and then receive a 20% on future orders/purchases. This is a great way to start your own Stampin’ Up! business or simply make your crafting funds go further. You get to save 20% on future sales/ purchases for at least the next 3 months.
Online Extravaganza ends 28 November – everyone loves to save money so visit my OnLine Store to see the savings you can make. Don’t forget to add the host code 4WYCHF2F – if your OnLine order is £20 or more.
If you’d like to make my 6th Birthday Challenge card you can shop for the supplies here
Details of the products used for my project are as follows. Please note that all products are from Stampin’ Up!
Live in the UK? Then you can purchase items via my online shop. Simply click on the pictures below.
If you prefer to order direct from me, that’s ok. Simply drop me an email or call 07707 695801.

Gorgeous card, Fiona! Love the mix of blues!
Beautifully festive 🙂 Hugs Bev x
The layered snowflakes are a fun take on the sketch, and the rhinestones are a perfect finishing touch for them. I love that your color scheme mimics the CC&S challenge blog header! 🙂
I love your snowflakes! Great take on the sketch.