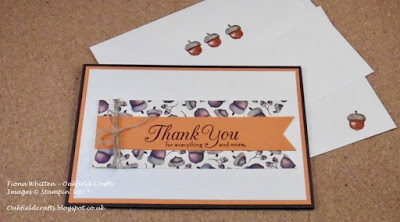
I spent a couple of days last week making a stack of thank you cards for my lovely team of Acorns.
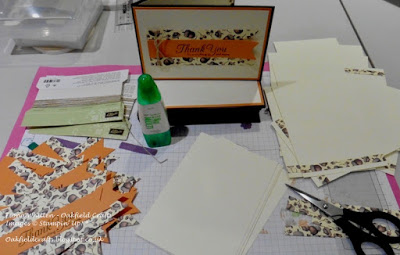
I kinda knew from the outset what I wanted to do. And, once I had made a card that I was happy with, I set up a bit of a production line to make things a little easier and quicker for making all of the rest.
Here are the various steps that I followed 26 times before moving onto the next one.
- Early Espresso A4 cardstock was cut in half at 10.5 cm to make two pieces each measuring 10.5 x 29.7 cm. Each piece was then scored and folded at 14.9 cm to make a card base.
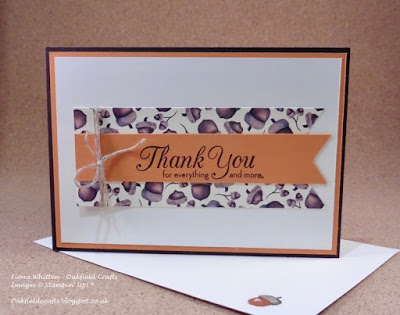
- Pieces of Very Vanilla measuring 9.5 x 13.9 cm were glued to pieces of Pumpkin Pie measuring 10.0 x 14.4 cm. This is turn was glued to the Early Espresso card base.
- The sentiment was stamped in Early Espresso onto a strip of Pumpkin Pie (2.5 cm wide) cardstock and the end was then punched using the Banner Triple Punch.
- The Pumpkin Pie sentiment was then glued to a strip of Painted Autumn Designer Series Paper (5.0 cm wide and one end punched using the Banner Triple Punch) and then some Linen Thread was wrapped around both pieces and tied in a bow. This completed piece was then in turn glued to the Very Vanilla piece on the card front.
- A 10.0 x 14.4 cm piece of Very Vanilla had a 1.5 cm strip of the Painted Autumn Designer Series Paper glued down the side and the whole piece was then glued inside the card.
And, yes read it right, I was brave and cut up my favourite sheet of paper from the Painted Autumn Designer Series Paper (both sheets from the pack). Shock horror.
This is the finished card, which has now gone out to everyone in the team along with a little gift. Please feel free to leave a comment and let me know what you think.
Don’t forget that the Painted Autumn Designer Series Paper is one of the sets of paper available in this month’s Buy 3 Get 1 Free offer.
Fiona xx
My project supply list to shop on-line is as follows:


