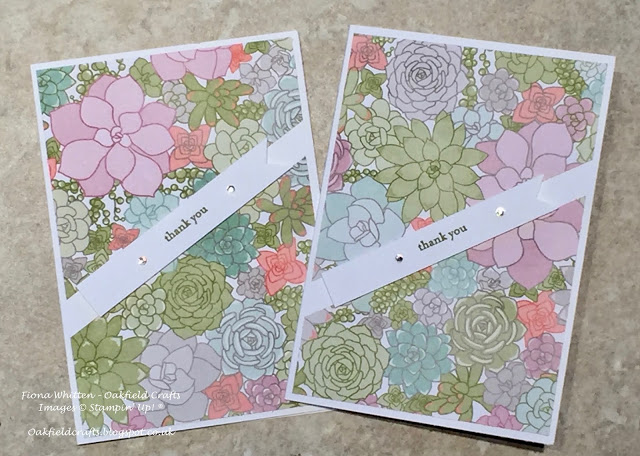
There’s nothing like leaving it to the last minute. My son was supposed to have sent a couple of thank you cards sometime ago, and being a boy he totally forgot (sigh). For some silly reason I said I would find him a couple from my stash, and send them onto him in a package of his that had just arrived.
I had thought that I had a couple that I could simply send but no, there are no cards here in San Diego. Typical. Oh well, out came some Designer Series Paper and a very basic sentiment stamp set and this is what I came up with.
I was trying to keep them as simple as possible, with not much depth, because both cards have to be sent from Chicago to the UK.
These cards are really quick and easy to make. They make great use of any double sided Designer Series Paper that you have and you can vary the look by making two cards at a time and simply switching the sides over.
The supplies are as follows:
- Base card – 14.9 x 21.0 cm (A5 = A4 cut in half)
- Piece of Designer Series Paper (DSP) – 10.0 x 13.4 cm (this assumes you want a 1.0 cm gap)
- Piece of Whisper White cardstock – 1.5 x 9.5 cm
- Old Olive ink
- Teeny Tiny Sentiments stamp set
- Rhinestones
The steps were as follows:
- Score and fold the base card in half at 10.5 cm, and then burnish the fold with a bone folder.
- Cut the DSP on the diagonal – mine is about 3 cm down from the top right corner and about 2 cm up from the bottom left corner.
- Glue the DSP to the card front. The two pieces will be separated by a 1.0 cm gap.
- Stamp a sentiment from the Teeny Tiny Sentiments stamp set, in Old Olive ink, onto the centre of the 1.5 x 9.5 cm piece of Whisper White,
- Cut a V in one end of the Whisper White strip to make a banner.
- Fix the banner over the gap using Stampin’ Dimensionals and then add a couple of rhinestones.
I hope you like the cards and as always, please feel free to leave a comment.
Fiona xx
If you are interested in finding out more about the supplies I used, details are as follows:

GOOD AND BETTER THAN NOTHING FOR SOMEONE