I found my Bow Builder Punch hidden in the back of my craft cupboard the other day, and took it out to have a quick play. A few hours later and I had quite a few bows stuck onto cards and other projects that I thought I would share with you. So, that’s my plan this week.
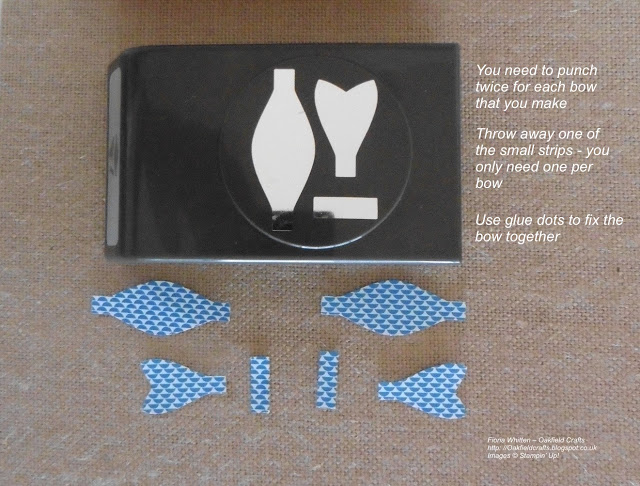
First off, a quick picture explanation for those of you who don’t know what the punch looks like and what you need to do.
 |
| All three elements are punched at the same time |
I’ve found that the best way to put the bow together is to:
- Use a bone folder to curl the bow part and then stick the square ends flat together with a glue dot.
- Use a glue dot to stick the two square ends of two curled pieces together.
- Use glue dots to stick the small strip around the middle where the two curled pieces have been attached.
- Then, use yet more glue dots to stick the tails together and then onto the back of the middle of the bow to get your finished bow.
I chose to use glue dots because it’s less messy and fiddly but if you prefer to use Multipurpose Glue that works too, but be prepared to be washing your hands quite a bit. I’ve worked out that I used 7 glue dots per bow, so you will go through a roll quite quickly if you are making lots of bows
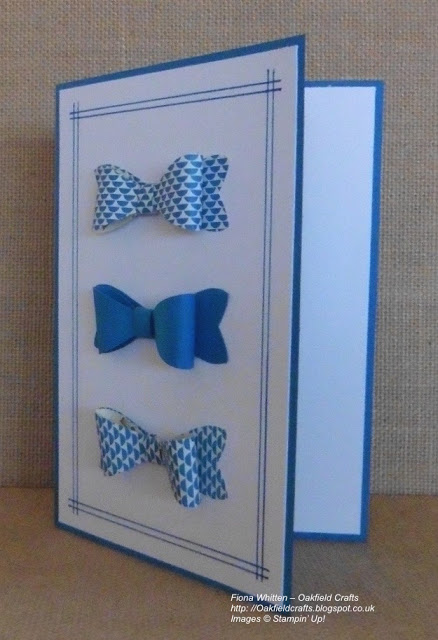
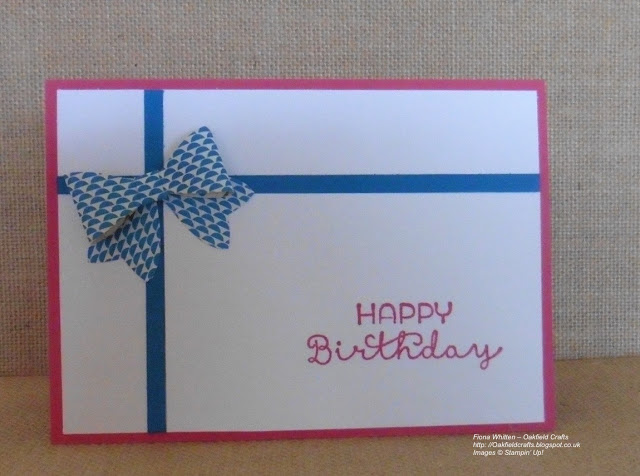
I’ve used Designer Series Paper and Cardstock on these two cards to make my bows. I did manage to get myself into a bit of a pickle with the Designer Series Paper because the pattern on it meant that I had to be careful which way I put things together. I would suggest that for the first couple of bows you make, that you use cardstock or Designer Series Paper that has a more random and forgiving pattern.
 |
| I should point out that the top and bottom bows have the same Designer Series Paper but I deliberately changed the direction of the pattern (honest) |
 |
| Changing the placement of the tails changes the entire look of the bow |
The top card has no stamping on it at all (gasp). The lines were drawn using a ruler and a Pacific Point Stampin’ Write Marker.
The bottom card, which is a little more feminine thanks to the Melon Mambo cardstock and stamped greeting (inked also using a Stampin’ Write Marker), has two thin strips of Pacific Point to make the cross frame.
I have a couple of other projects to share and will be back with another soon. In the meantime, if you fancy giving the cards a go here’s a list of the products used:
Built for Free Using: My Stampin Blog
Thanks Katie, I agree, a box envelope is a must if you want the bow to stay as it is and the envelope punch board is a great tool to make them.
I love the second card – it's gorgeous! I will definitely have to be making me some of those. Think they will need box envelopes, too, so will have to brush up on my envelope punch board techniques…
Now, can I teach hubby to make this in time for my birthday next week…?! 😉